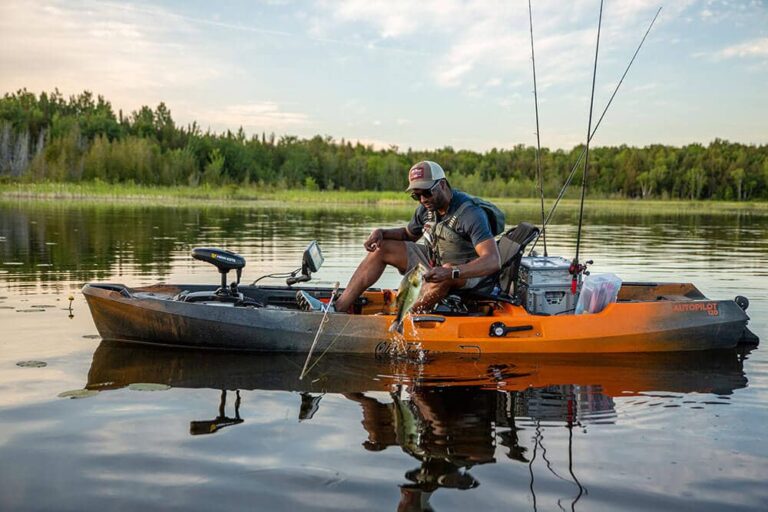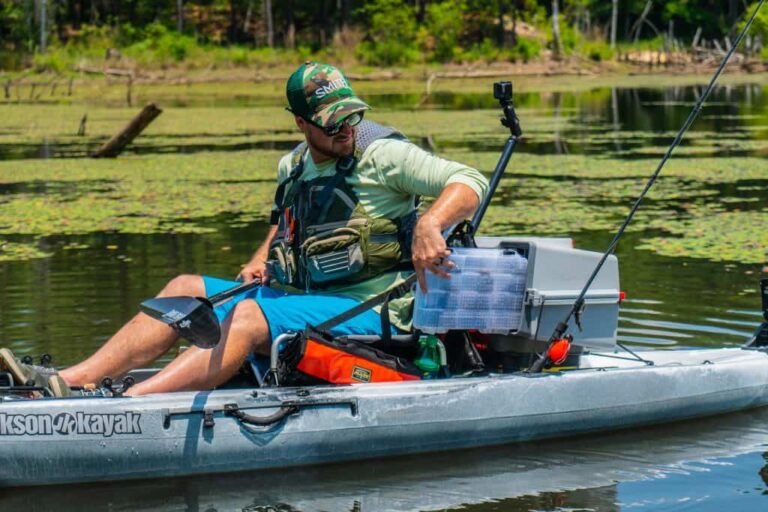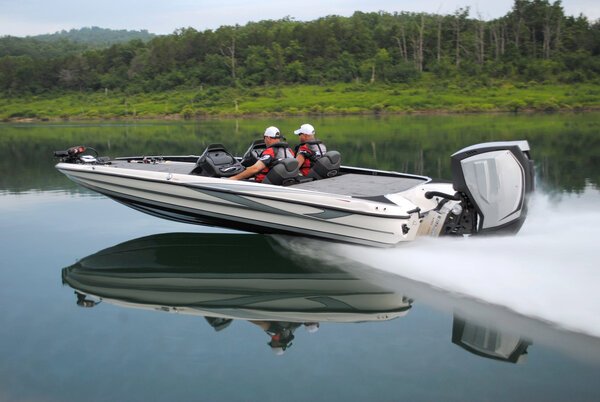
How to Read A Fish Finder: The Ultimate Guide
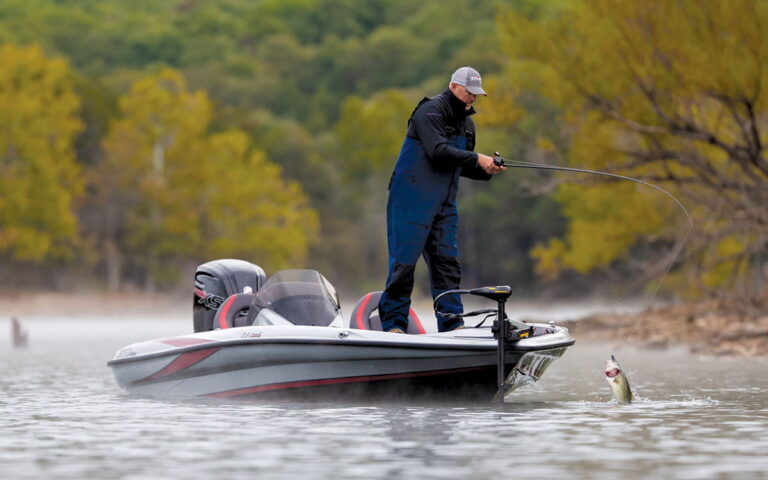
If you’ve ever wondered where those elusive fish are hiding, fish finders are the answer!
In this article, we’ll guide you through the secrets of reading a fish finder like a pro.
From interpreting sonar data to decoding bottom structures, get ready to level up your fishing game. Let’s dive in and make those epic catches!
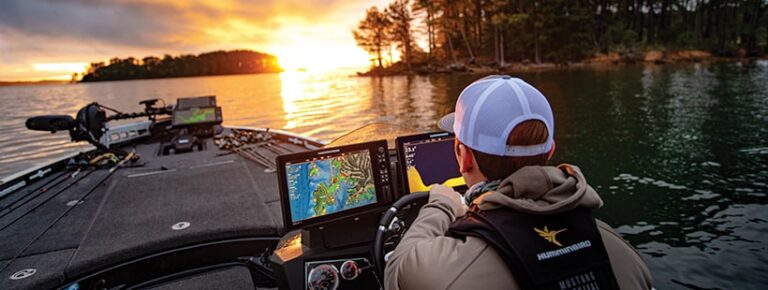
Understanding the Fish Finder Display
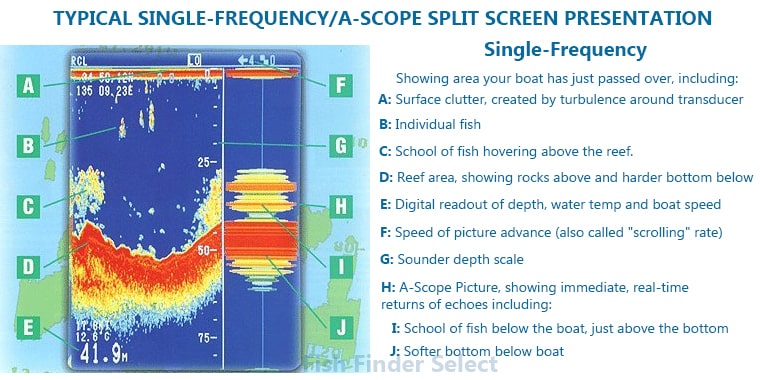
- Sonar Graph: The heart of the fish finder display is the sonar graph, which shows real-time sonar readings. It represents the underwater landscape and any objects or fish detected. Sonar graphs can be displayed in various ways, such as scrolling horizontally or vertically.
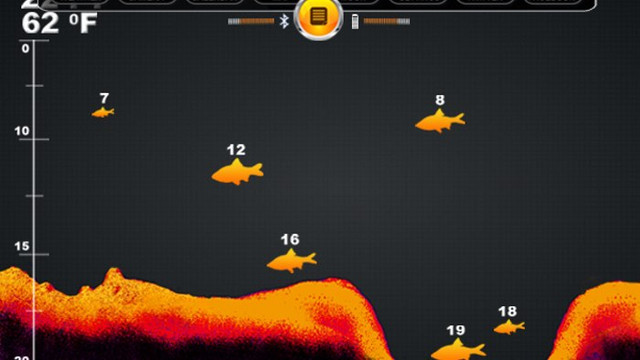
- Fish Icons: Many fish finders have a feature that automatically identifies fish and displays them as fish icons on the screen. These icons vary in size and shape based on the strength of the sonar return. While convenient, it’s essential to learn how to read raw sonar data for more accurate fish identification.
- Depth Indicator: This component indicates the depth of the water beneath your boat. It’s typically displayed numerically, and some fish finders use colors or shading to represent different depth ranges.
- Water Temperature: The water temperature reading shows the temperature of the water at your current location. It can be vital in locating fish, as different species have preferred temperature ranges.
- Bottom Composition: The fish finder may show the type of bottom composition, such as rocks, mud, sand, or vegetation. Understanding the bottom structure can help you find potential fish-holding areas.
- Zoom Function: Fish finders often come with a zoom feature that allows you to magnify a specific section of the sonar graph. This is useful for focusing on the depth range where you expect to find fish.
- Gain and Sensitivity Controls: These settings allow you to adjust the fish finder’s sensitivity to better detect fish and underwater structures. Properly tuning these controls ensures a clear and accurate display.
- GPS Navigation: Some advanced fish finders come with built-in GPS functionality, displaying your boat’s position on a map. This feature helps you mark waypoints, track your fishing routes, and return to productive spots.
- Split-Screen View: Many fish finders offer a split-screen mode, allowing you to view multiple functions simultaneously. For example, you can see the sonar graph alongside GPS navigation or a zoomed-in section.
Also Read: Best Fish Finder for the Money
Reading Sonar Data
Different Types of Sonar
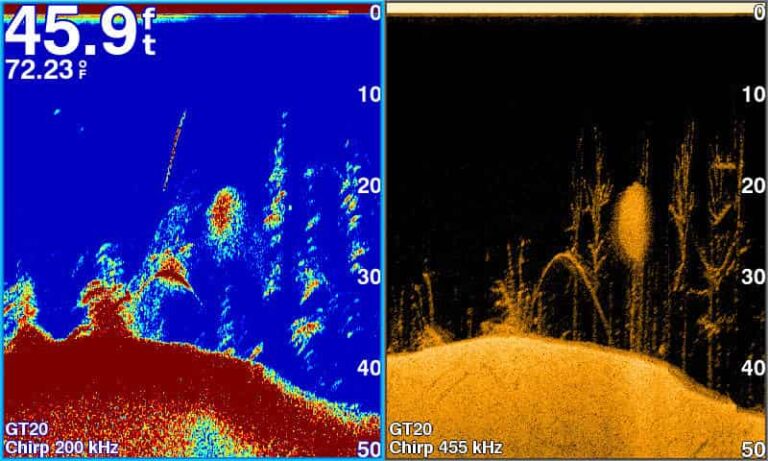
- CHIRP Sonar:
- CHIRP stands for Compressed High-Intensity Radar Pulse.
- This technology uses a continuous sweep of frequencies to create more detailed and accurate sonar images.
- The fish finder sends out a range of frequencies, covering a wide spectrum, which results in improved target separation and better target identification.
- CHIRP sonar is excellent for identifying fish arches and differentiating between fish and underwater structures.
- DownScan Imaging:
- DownScan technology provides a high-resolution, photo-like view of the bottom directly beneath your boat.
- It uses thin, fan-shaped sonar beams to capture detailed images of underwater structures, vegetation, and fish.
- DownScan is ideal for observing the bottom composition and spotting fish holding close to the lake or seabed.
- SideScan Imaging:
- SideScan sonar extends the sonar beams horizontally from both sides of the boat, creating a wide and comprehensive view of the underwater environment.
- This technology is incredibly effective for locating fish and structures that may be positioned away from your boat’s track.
- SideScan is perfect for scouting large areas quickly and finding hidden spots that might be missed with traditional sonar.
- StructureScan:
- StructureScan combines DownScan and SideScan technologies to provide a comprehensive view of the underwater world.
- It offers both the high-resolution details of DownScan and the wide coverage of SideScan, making it an ideal choice for anglers seeking detailed information about the underwater terrain and fish locations.
What Each Sonar Image Means
Understanding sonar images is like deciphering a secret language of the underwater world. When you glance at the sonar graph on your fish finder, it may seem like a bunch of colorful lines and shapes, but fear not! Let’s demystify these images and uncover what they represent:
- Echoes and Reflections:
- Sonar works on the principle of sending out sound waves (pings) that bounce off objects beneath the water’s surface.
- When the sound waves hit something, they bounce back to the fish finder as echoes.
- These echoes are displayed on the sonar graph, and the time it takes for the echoes to return helps calculate the depth of the objects.
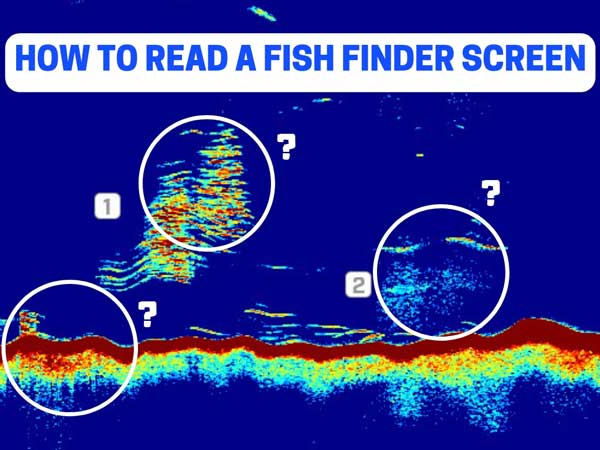
- Fish Arches:
- One of the most sought-after sonar images is the fish arch. It appears as an upside-down “U” on the graph.
- As fish swim through the sonar beams, their air-filled swim bladders create strong echoes, showing up as arch-shaped images.
- The size of the fish arch can give you an idea of the fish’s size, and the thickness of the arch indicates the fish’s distance from the transducer.
- Suspended Fish:
- Sometimes, fish appear as solid, thicker marks on the sonar graph instead of arches. These are likely suspended fish, which are swimming at a particular depth rather than hugging the bottom.
- Suspended fish can be found at various depths and may indicate a school of fish or potential feeding zones.
- Bottom Structure and Composition:
- The sonar graph also reveals details about the underwater terrain and bottom composition.
- Hard structures like rocks and reefs create strong, well-defined echoes, while soft bottoms like mud or sand produce weaker echoes.
- Vegetation and underwater plants may appear as cluttered, jagged lines on the graph.
- Baitfish and Predator Fish Patterns:
- Sonar can help identify baitfish (smaller fish that larger fish prey on) and predator fish like bass or pike.
- Baitfish often form dense schools and show up as cloud-like or scattered echoes, attracting larger predator fish in the area.
- Thermoclines:
- In some cases, you might notice a distinct temperature change in the water column. This is called a thermocline.
- Thermoclines can influence fish behavior, as some species prefer specific water temperatures.
Remember, interpreting sonar images may take some practice and experience, but with time, you’ll become proficient in identifying fish, structures, and other underwater elements.
Pay attention to the context of the area you’re fishing in, and soon you’ll be reading sonar like a pro and enhancing your fishing success.
How to Read a Fish Finder
Identifying fish arches, suspended fish, and structures on your fish finder is like being a detective in the underwater world. Let’s dive into how to spot these important elements and what they mean for your fishing success:
Fish Arches
- Fish arches are the classic sign of fish on a fish finder. They appear as curved, arch-shaped marks on the sonar graph.
- The arches are created by the fish’s swim bladder reflecting the sonar signal back to the transducer.
- To distinguish fish arches from other sonar signals, look for consistent, repeating patterns on the graph. Fish arches will show up as continuous curves, unlike other random or scattered shapes.
Suspended Fish
- Suspended fish are those that are not in direct contact with the bottom but are swimming at various depths in the water column.
- On the sonar graph, suspended fish may appear as thicker, more solid marks without a distinct arch shape.
- These marks can be found at different depths and often indicate schools of baitfish or gamefish suspended in the water.
Underwater Structures
- Fish finders are excellent at detecting underwater structures like rocks, reefs, sunken logs, and vegetation.
- These structures typically show up as strong, well-defined echoes on the sonar graph, often forming a distinctive shape.
- Keep an eye out for irregular shapes or lines that don’t align with the surrounding bottom composition, as these could be hidden hotspots for fish.
Identifying Fish Size
- The size of fish arches can give you an idea of the fish’s size, but it’s essential to consider the scale and settings of your fish finder.
- Larger fish will generally create wider arches, while smaller fish may produce narrower arches or appear as solid marks.
Fish Movements
- Pay attention to the movement of fish signals on the graph. If you notice consistent movement in one direction, it could indicate a school of active fish.
- Fish that remain stationary or change depth slowly might be less active and less likely to strike at your bait.
Depth Considerations
- Understanding the depth range where you find fish arches or suspended fish is crucial for successful fishing.
- Experiment with different lure depths and presentations to match the fish’s preferred zone.
Depth and Water Temperature Readings
Understanding water depth and temperature is crucial for successful fishing. Water depth determines fish positioning, while water temperature influences their activity levels.
By interpreting these readings on your fish finder, you can target the right areas and adjust your approach for better fishing results.
Reading Water Depth
- Understanding Depth Units:
- Fish finders typically display depth readings in feet or meters. Ensure you know the unit your fish finder is set to for accurate interpretation.
- Depth Scale and Range:
- Pay attention to the depth scale on the side of the display. It shows the maximum depth range visible on the screen.
- Adjust the depth range to match the water depth you are fishing in. If the depth exceeds the scale, you may miss important details in the deeper parts.
- Depth Lines and Contours:
- On some fish finders, you’ll notice horizontal lines on the screen representing specific depth intervals (e.g., every 10 feet).
- These lines help you quickly gauge the water depth at a glance and identify potential fishing zones.
- Depth Variations and Drop-offs:
- Keep an eye out for sudden changes in depth, such as drop-offs or ledges. These underwater features can attract fish looking for food and shelter.
- A sharp increase or decrease in depth is often an indicator of a potential fish-holding spot.
- Vertical Jigging and Presentations:
- Vertical jigging is a popular fishing technique where you drop your bait or lure directly beneath the boat and work it at different depths.
- Use the depth reading to precisely position your bait in the strike zone, especially if you see fish or structures at a specific depth.
- Shallow Areas and Weeds:
- Shallow areas and weedy regions may register as shallower depth readings on the fish finder.
- Knowing where the shallows are helps avoid running aground and identifies locations where fish may be seeking cover.
- Thermoclines and Temperature Layers:
- A thermocline is a distinct temperature change in the water column, and it may show up as a depth reading on the fish finder.
- Fish might be more active above or below the thermocline, depending on their temperature preferences.
- Tracking Depth Changes:
- As you move your boat, observe how the depth readings change. It will help you identify contours, underwater channels, and potential fish travel routes.
Reading Bottom Composition and Structure
Reading bottom composition and structure is like deciphering the underwater landscape, revealing where fish love to hide. Here’s how to do it:
- Identify Bottom Composition:
- Pay attention to the sonar graph’s echoes to distinguish between different bottom compositions, such as rocky, muddy, sandy, or weedy areas.
- Rocky bottoms usually appear as dense, irregular echoes, while muddy or sandy bottoms create smoother, less-defined signals.
- Spot Underwater Structures:
- Look for strong, distinct echoes that indicate the presence of submerged structures like reefs, sunken logs, or man-made objects.
- These structures attract fish seeking shelter and create prime fishing spots.
- Watch for Drop-offs and Ledges:
- Keep an eye out for sudden changes in depth, which could signal drop-offs or ledges.
- These depth variations often act as fish highways, where they move between shallow and deeper waters to feed.
- Identify Vegetation and Weeds:
- Vegetation appears as cluttered, jagged lines on the sonar graph.
- Weedy areas provide ideal cover for fish and are prime locations for fishing.
- Combine Data for Targeting Fish:
- By interpreting bottom composition and structure data along with fish arches, you can develop a comprehensive picture of the underwater environment.
- Focus your fishing efforts on areas where fish arches coincide with appealing bottom features.
- Create Waypoints:
- Mark productive spots on your fish finder with waypoints, allowing you to return to successful locations in the future.
Advanced Fish Finder Strategies
For seasoned anglers looking to take their fish finder interpretation to the next level, here are some advanced tips to fine-tune your fishing game:
- Study Fish Behavior and Habitat:
- Invest time in learning about the behavior and preferred habitat of the fish species you’re targeting.
- Understanding where and how they like to feed and hide will help you interpret sonar data more effectively.
- Master Sonar Sensitivity Settings:
- Experiment with the sensitivity settings on your fish finder to optimize its performance in different fishing conditions.
- Higher sensitivity can reveal more details, but it may also pick up unwanted noise. Finding the right balance is key.
- Combine Multiple Sonar Technologies:
- If your fish finder supports multiple sonar technologies (CHIRP, DownScan, SideScan), learn to use them in tandem.
- Combining different views can provide a comprehensive understanding of the underwater environment.
- Fine-Tune Depth Range and Zoom:
- Adjust the depth range and zoom level based on the specific area you’re fishing in.
- Narrowing the depth range and zooming in can help focus on precise details, while widening it provides a broader view.
- Track Fish Movements:
- Observe how fish move and react to your bait or lure on the fish finder.
- Identifying patterns in their movements can lead to more strategic presentations.
- Use GPS Waypoints Strategically:
- Utilize GPS waypoints to mark productive spots, but don’t limit yourself to just those locations.
- Continuously explore and experiment with new areas to expand your fishing knowledge.
- Learn from Past Trips:
- Review previous fishing trips and analyze the sonar data from successful outings.
- Identify patterns and factors that contributed to your success, and apply those lessons to future fishing trips.
- Stay Updated with Technology:
- Keep up with advancements in fish finder technology and software updates to make the most of your equipment’s capabilities.
- Stay Open to Learning:
- Fishing is an ever-evolving pursuit, and there’s always something new to discover.
- Stay curious, learn from fellow anglers, and be open to trying new techniques and approaches.
By honing your fish finder interpretation skills and combining them with a deep understanding of fish behavior, you’ll become a true fishing maestro.
Embrace the adventure, and let your fish finder be your trusted partner in uncovering the mysteries of the underwater world.
Finishing This
Now that you know how to read a fish finder, you’re ready to dive into the underwater world and reel in more catches than ever!
Remember, practice makes perfect, so keep honing your skills and enjoying the fishing adventure. Tight lines and happy fishing!